raster
A grid groovebox.
Try it at raster.osk.workers.dev
In short: raster is a grid groovebox that runs in the browser, inspired by the Yamaha Tenori-on and built with React and Tone.js. It has up to 16 layers, seven synth engines, sample chopping with transient detection, Elektron-style parameter locks, and pages that chain into songs. Note timing runs on the Web Audio clock, separate from React rendering, so a dropped frame never delays a note.
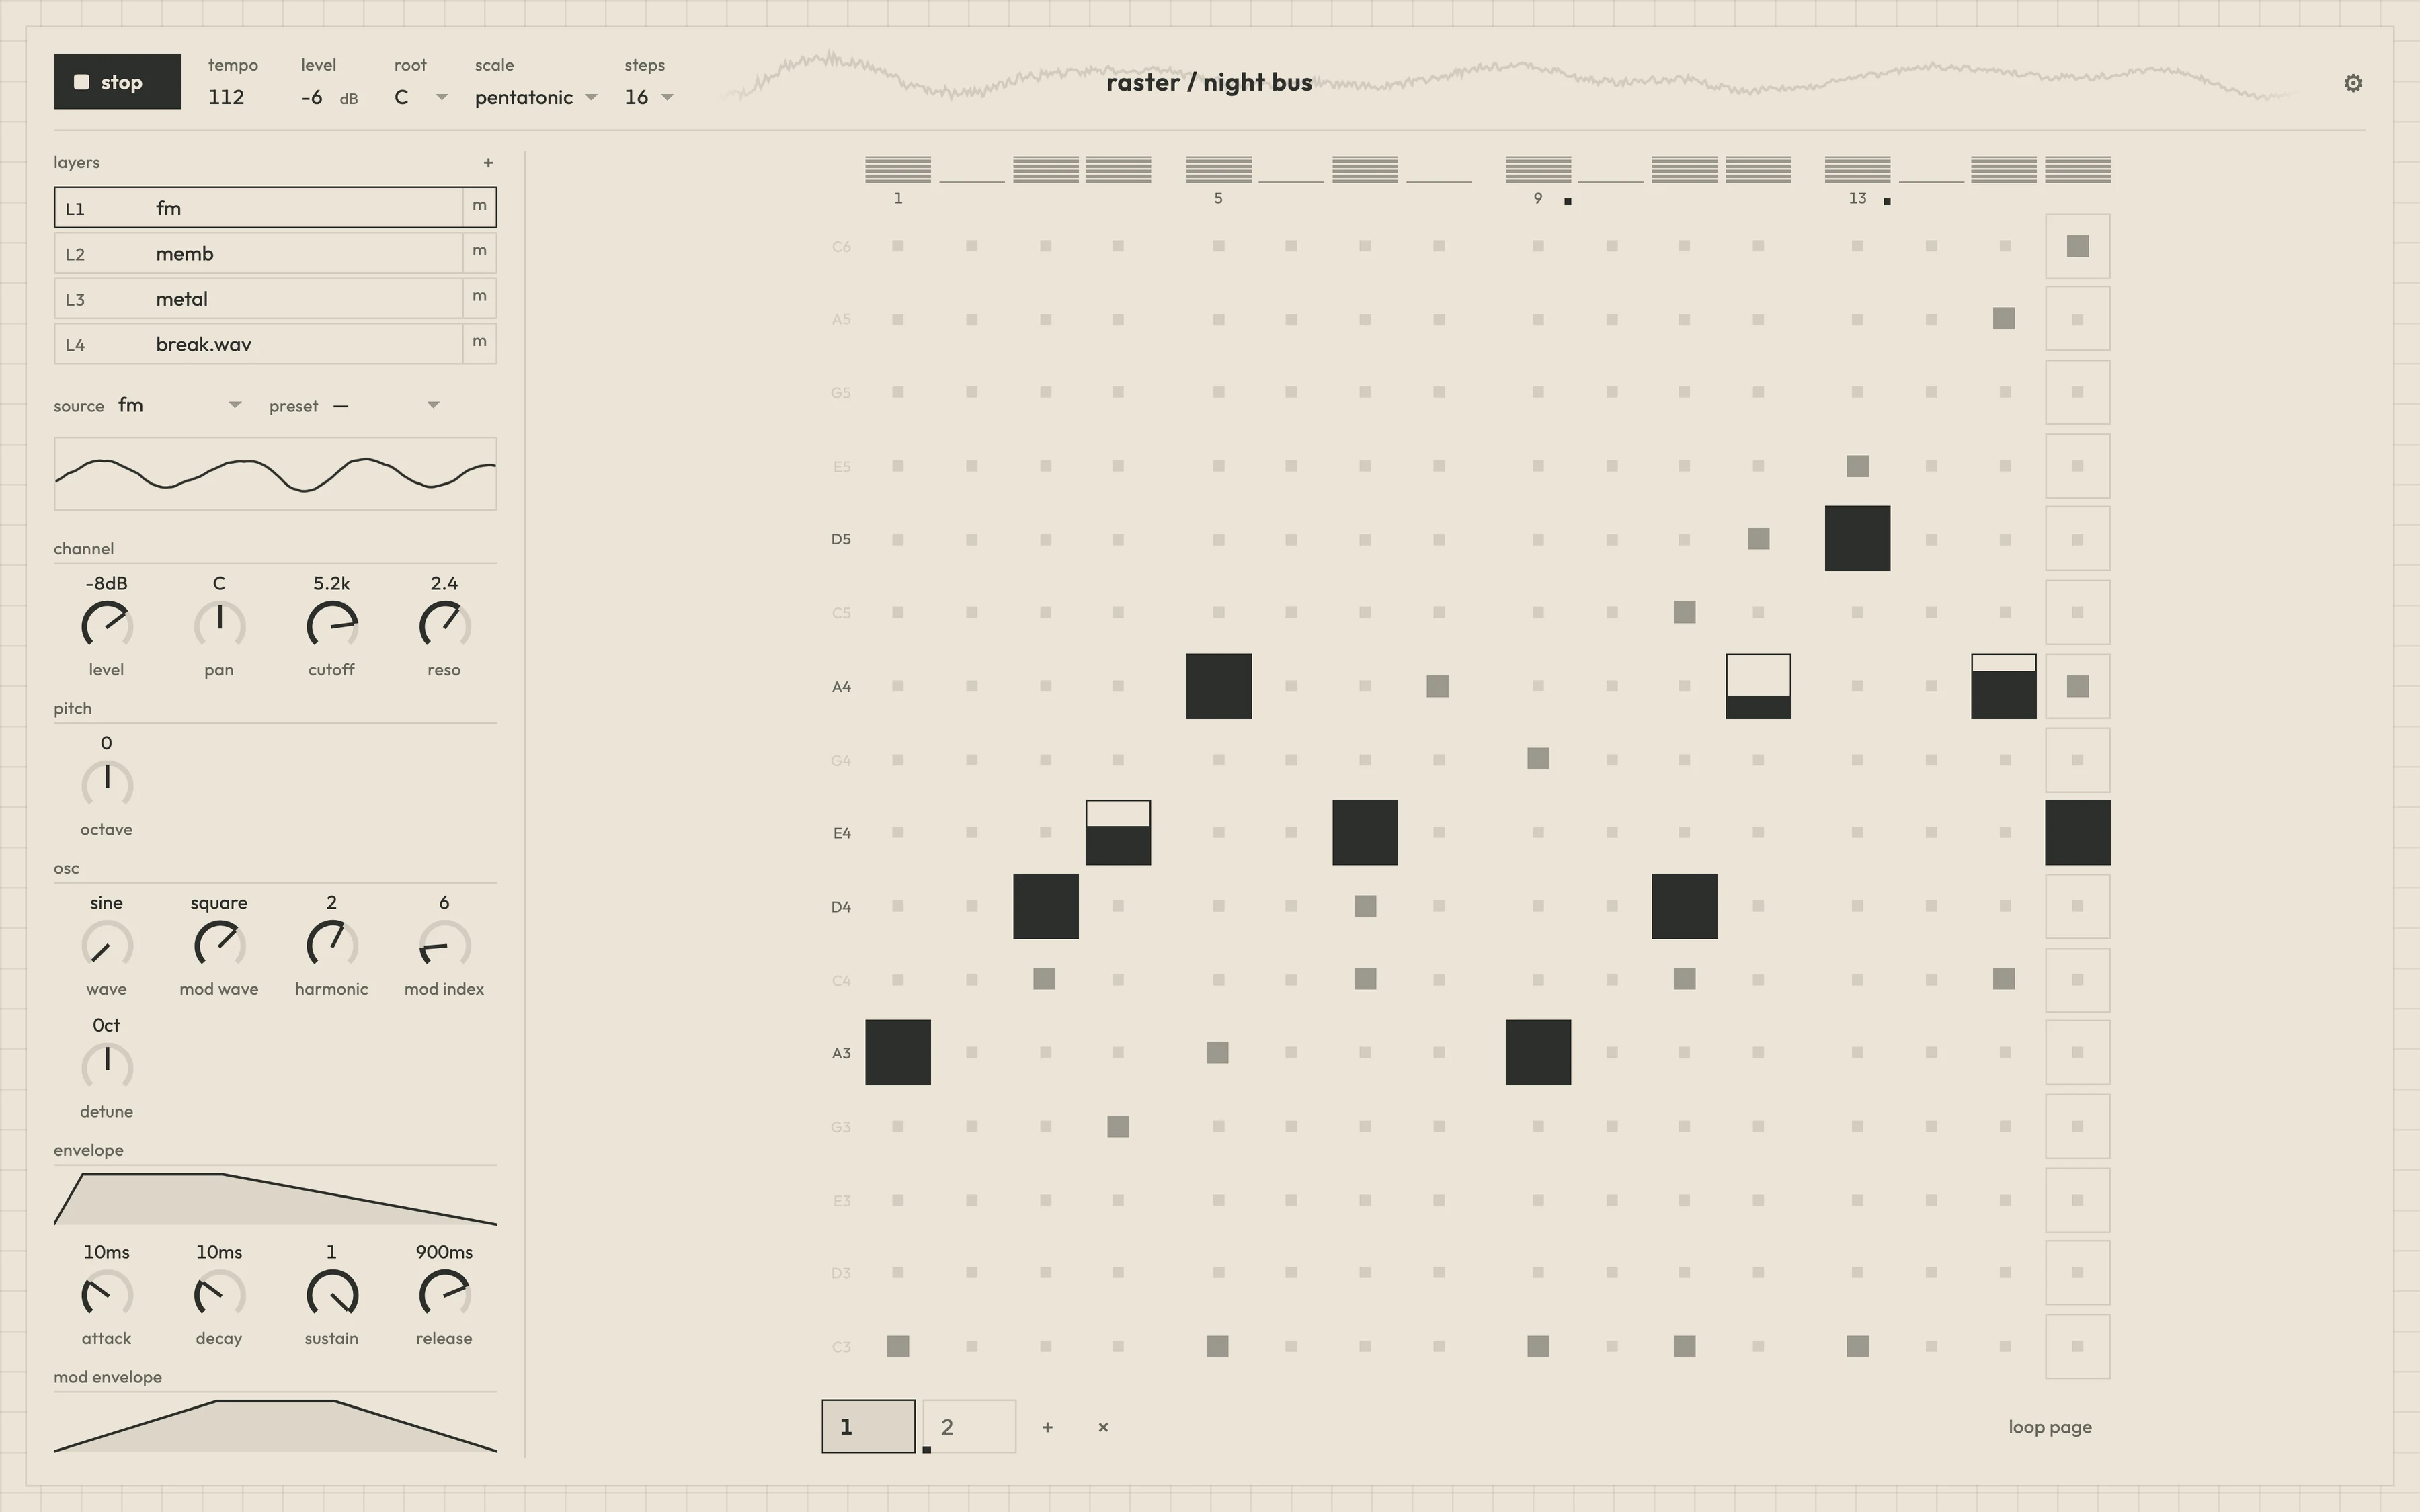
I’ve been fascinated with signal processing, music production and synthesizers for years. One of early examples of instruments that I loved is Yamaha Tenori-on – a 16×16 grid of lights where the playhead sweeps across and lit cells make sound. Ever since I discovered it I understood that grids are the most intuitive way to represent musical sketches for me. As I dove deeper into the world of grooveboxes, drum machines and samplers, the lingering memory of 16×16 grid prevailed and kept hunting me. I decided to build my own grid sequencer, based on everything I learned about music, instruments and process. It’s called raster: up to 16 layers, seven synth engines, sample chopping with transient detection, Elektron-style parameter locks, per-layer FX and pages that chain into songs.
Features
Everything on one screen.
Scroll to look closer.
01 · Sequencing
- A 16×16 grid with 16 or 32 steps per page
- Tempo and master level as numbers you drag or type. Scale (pentatonic, major, minor, chromatic) and root note.
- Up to 16 layers, each with its own pattern, level and mute. Notes on other layers show as faint dots.
- Per-note probability: drag a note up or down to set its chance of playing, with a tooltip showing the percentage.
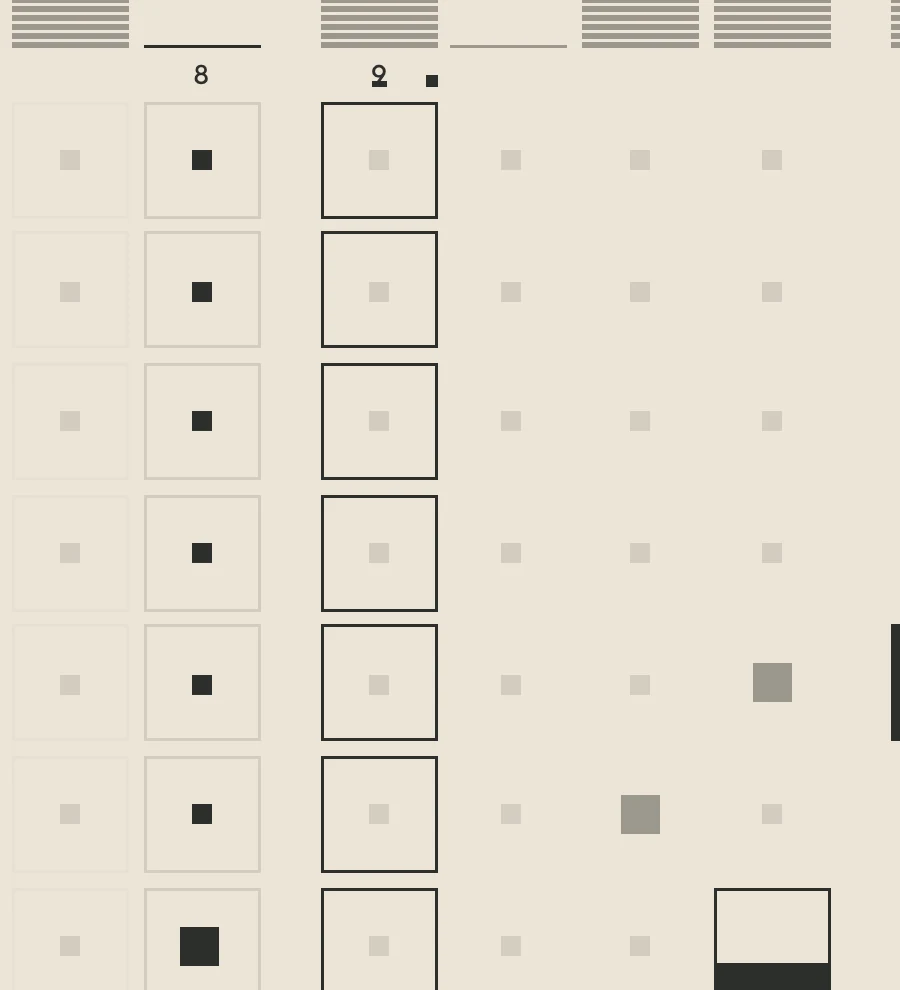
- Parameter locks: click a step number to select that step, then change any knob for that step only
- Up to 8 pages that play back to back. A new page starts as a copy of the current one, a single page can loop, and switching pages slides the grid.
02 · Sound sources
- Seven synth engines: synth, FM, AM, membrane, metal, pluck and noise, with an octave setting per layer.
- Sample layers that play slices of an audio file.
03 · Sound design
- A full set of knobs for each engine: oscillator, envelopes, modulation and the engine’s own settings, with a drawing of each envelope and a live oscilloscope.
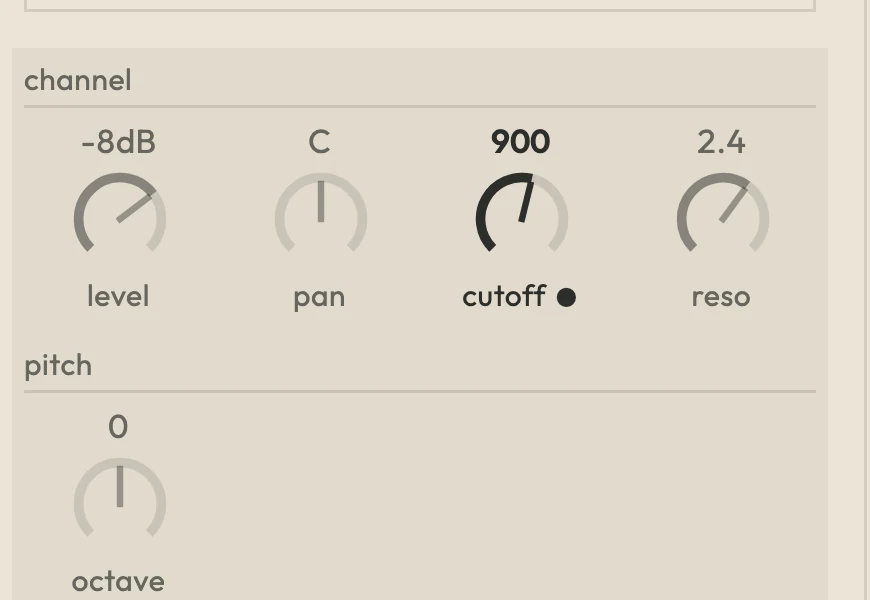
- A channel strip on every layer: level, pan, low-pass cutoff and resonance, and fine detune (±100 cents).
- Per-layer saturator, tempo-synced delay and reverb, each with an on/off switch that doesn’t click.
- Knobs respond to dragging (Shift for fine steps) and arrow keys. Click a value to type it in, and double-click a knob to reset it.
04 · Songs
- Projects that save automatically, with open, new, duplicate, rename and delete.
- Export and import a project as a
.rasterfile with its samples inside. - Layer presets that save a layer’s sound and work in every project.
- Samples are kept between sessions.
05 · Interface
- A monochrome design in light and dark, set to follow the system or chosen in settings.
- A waveform of the master output behind the header while playing.
- A phone layout where the grid keeps its size and the controls sit in tabs below it.
- Playback never stops for editing. Clearing or removing layers and pages, and resizing the grid, all happen while it plays, and anything destructive asks for a second click instead of opening a dialog.
- Cells light up and fade like LEDs, layers animate in and out, and all motion turns off for people who prefer reduced motion.
Close up
Details.
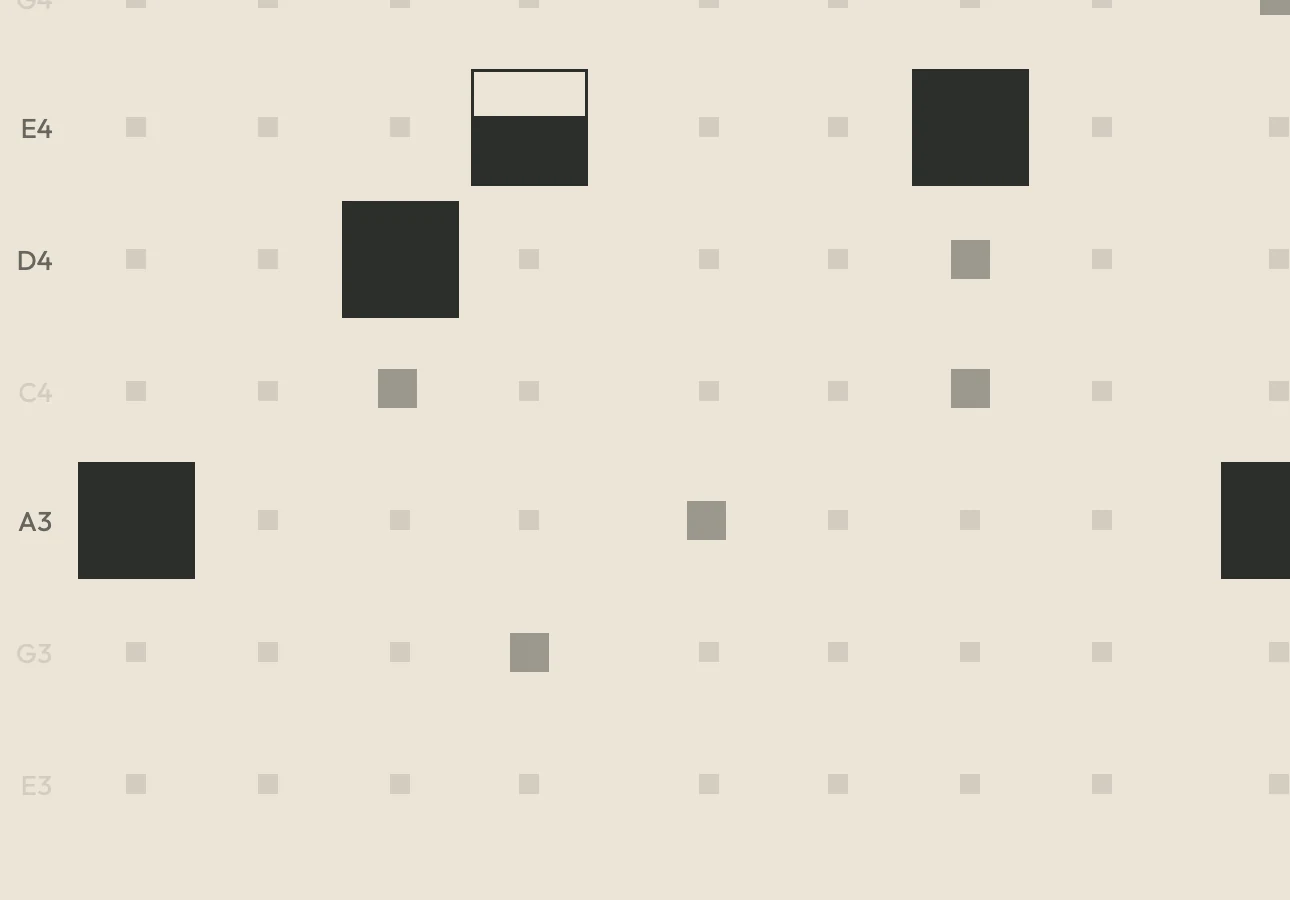
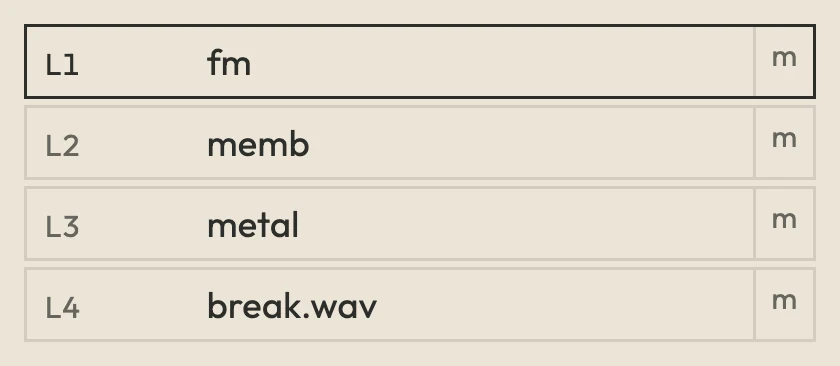

Light, dark, phone
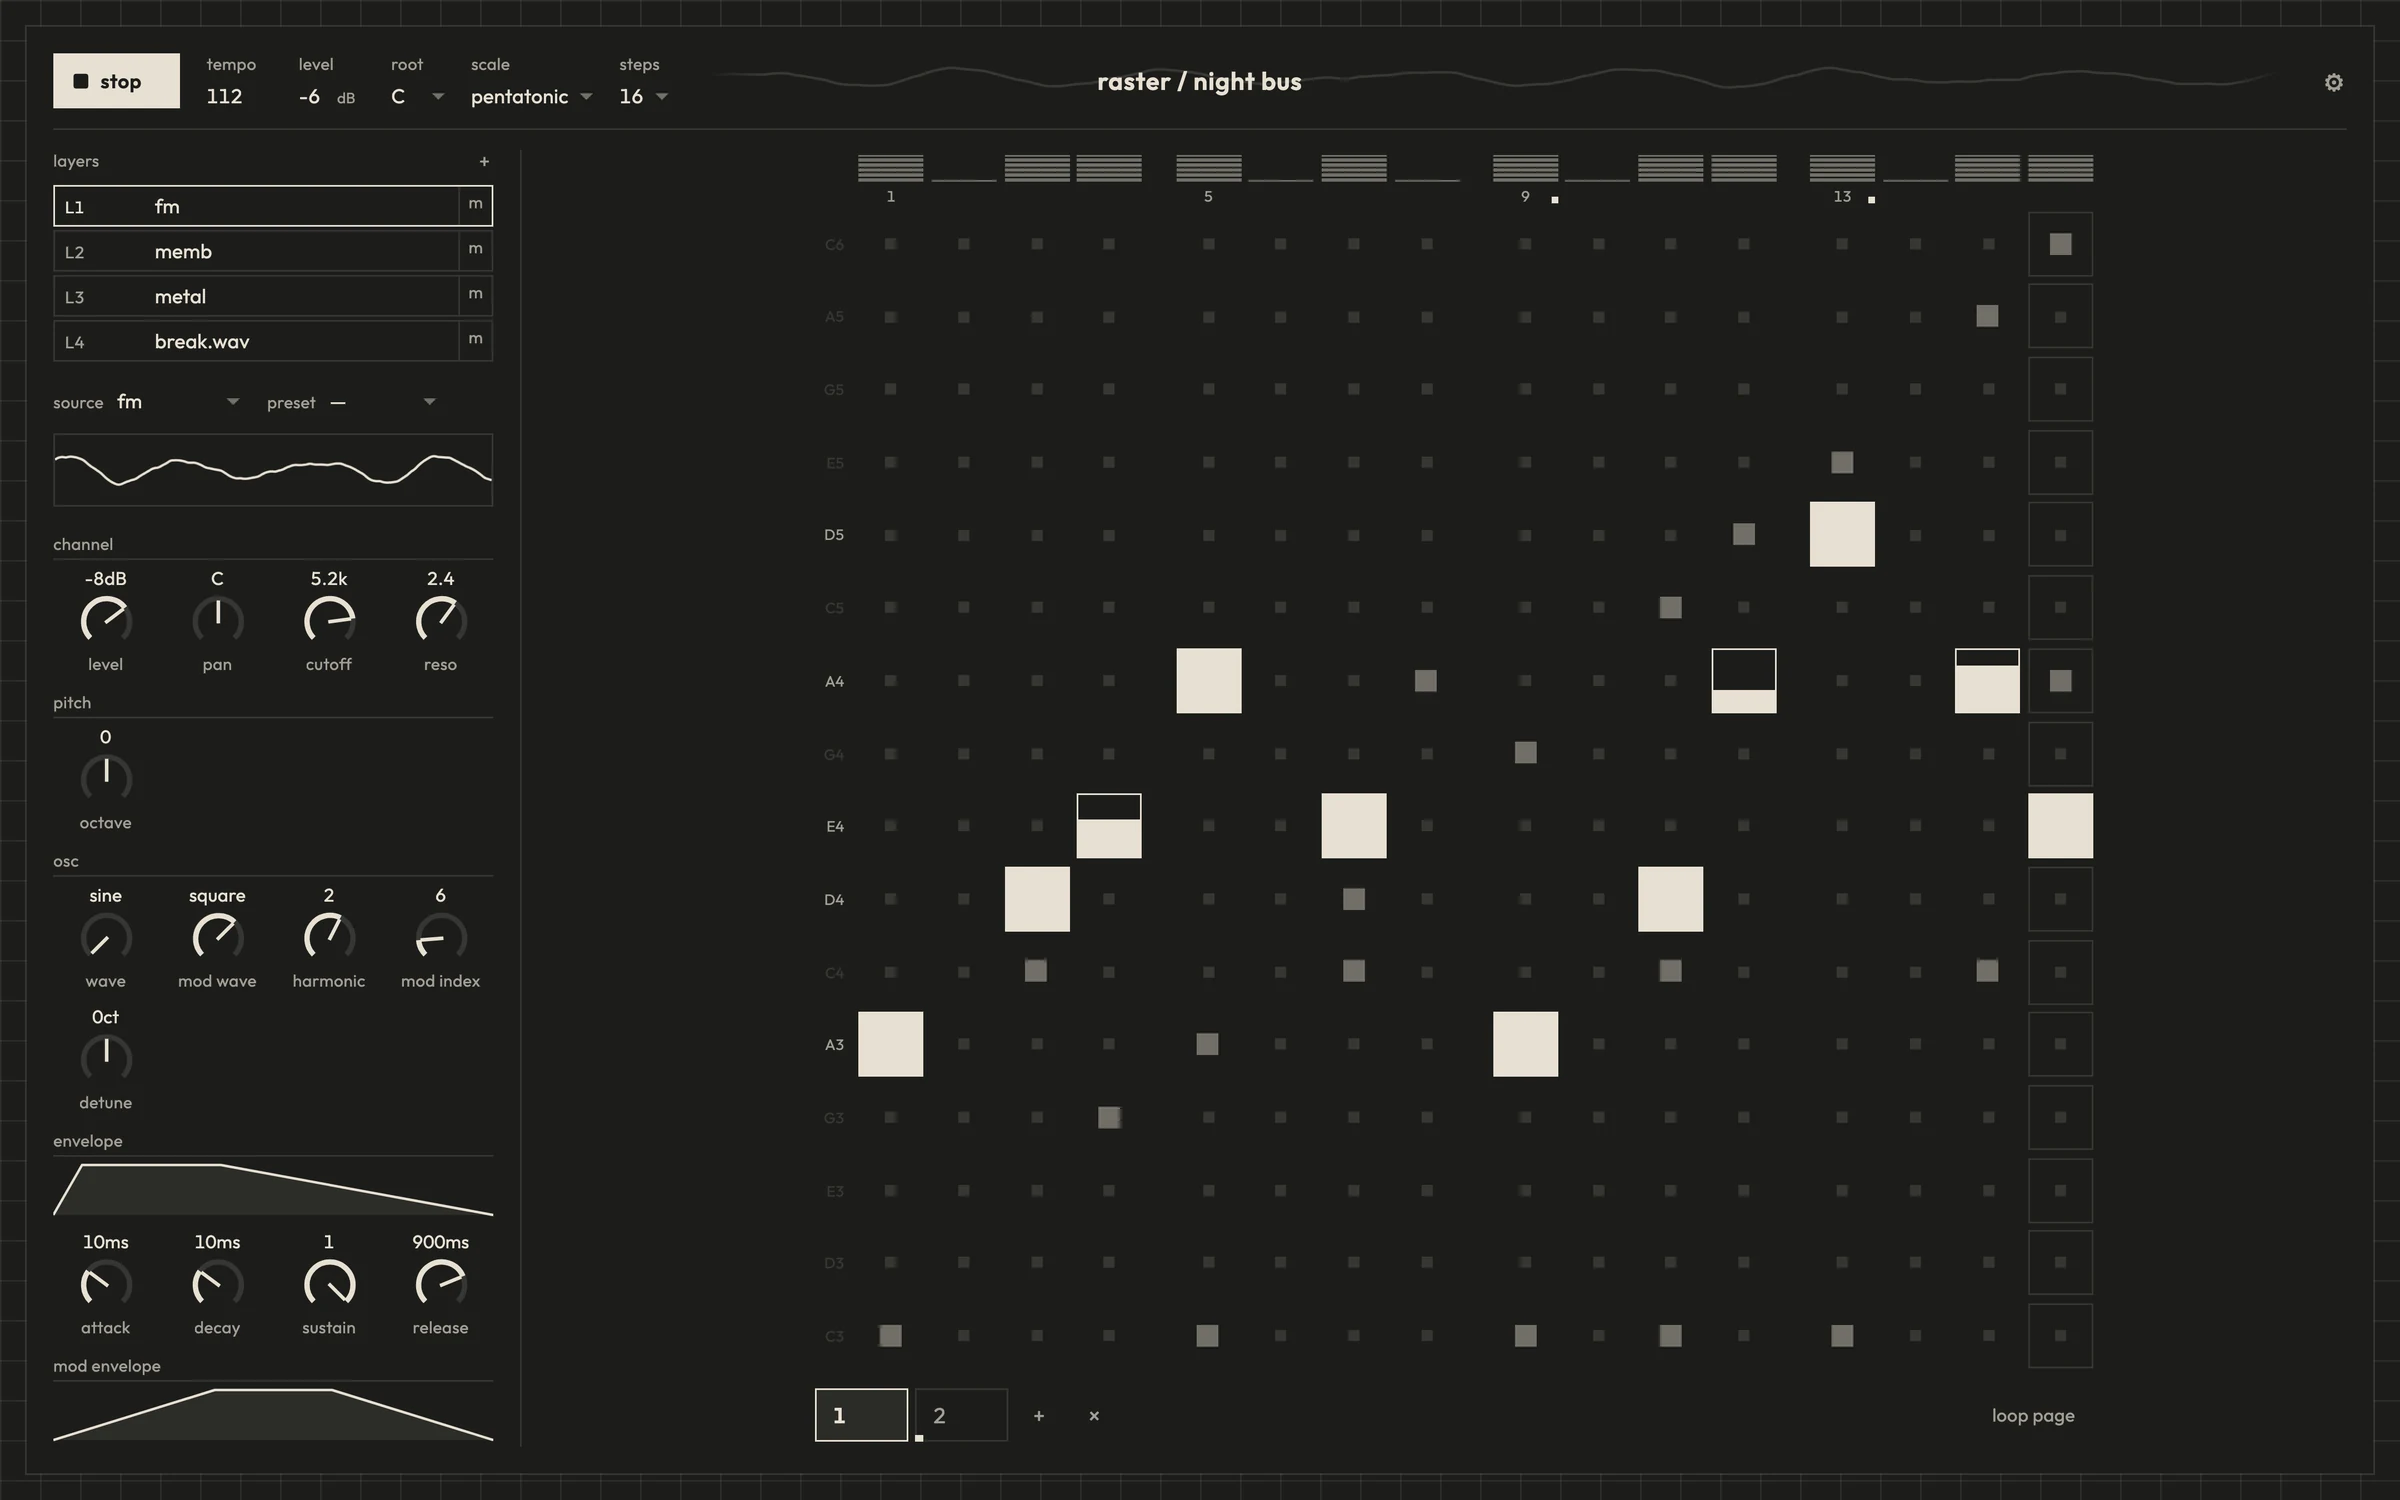
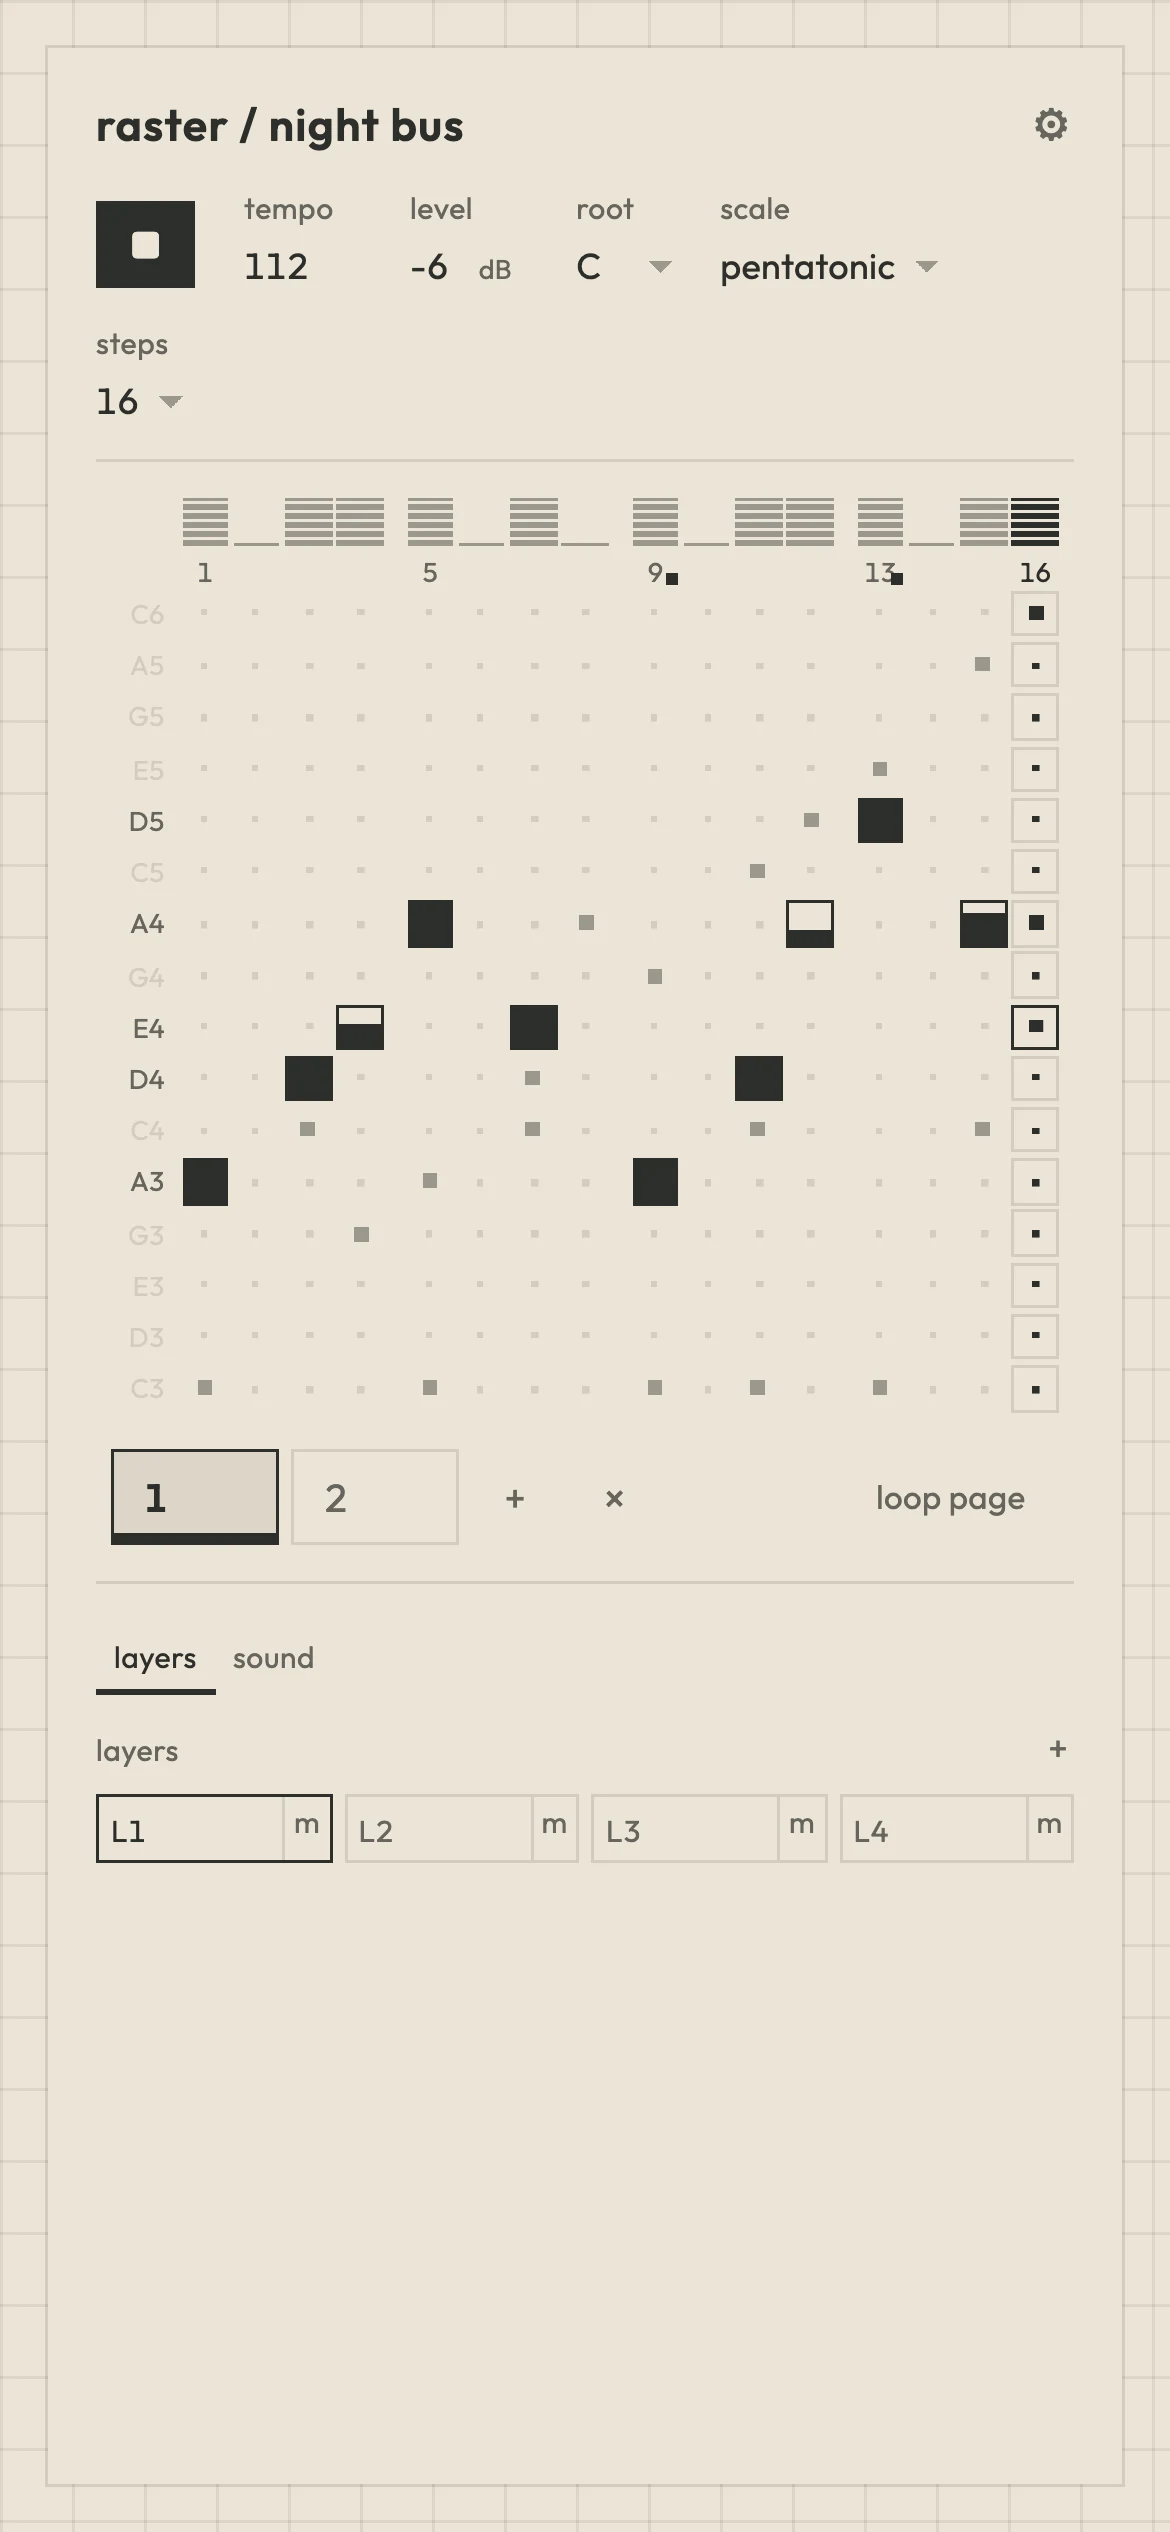
The dark theme follows the system unless you pick one in settings. On a phone the grid keeps its size and the controls move into tabs.
Project → layers → pages
A project holds one song.
Layers are instruments. Pages are sections of the song in time. A page has no data of its own. Each layer stores one long row of steps, and page p is steps p × steps to (p + 1) × steps of every layer. Switching page changes all layers at once, the way switching pattern does on a drum machine.
Because pages are ranges of steps, notes, parameter locks, probabilities and per-step voice groups worked on pages without extra code. Adding, copying and removing a page all go through one function that rebuilds each layer’s steps from the old ones. Looping a page narrows the range the engine plays. The engine reads that range on every 16th note, so page changes never stop playback and the playhead keeps its place in the bar.
Each layer has two parts. Its sound is the source kind, the knob settings for that kind, and on sample layers the sample and its slices. Its part in the song is the notes, locks, probabilities, level and mute. A preset saves only the sound, so applying one leaves the pattern alone. Presets are shared between all projects.
Samples are stored once, keyed by the SHA-256 of their bytes, and projects refer to the hash. A break used in five projects is stored once. Cleanup deletes any sample that no project or preset refers to. A .raster export contains the project and the samples it uses, and import checks each sample against its hash.
Signal flow
Each layer runs through a channel strip built from Tone.js nodes, in the same order as a hardware mixer channel.
- voicespool
- low-passfilter
- saturatorparallel
- levelfader
- pan
- layer mute
- master
- out
Synth layers use a pool of 8 voices in rotation. Each voice has its own gain, so a choke can silence it in 3 ms. Sample layers create a player for each hit, or a grain player when time-stretching.
The filter comes before the saturator, so the drive works on the filtered sound. The saturator runs in parallel with a dry path, and switching it on or off crossfades the two over 30 ms instead of cutting over.
Delay and reverb sends are taken after the level fader, so turning a layer down also turns down its echoes.
Each layer has its own tempo-synced delay and its own reverb. A bus is only created while its switch is on. When it’s off it doesn’t exist, so a layer without FX spends no processing on them.
Mute comes after the buses, so muting a layer also silences its tails and echoes. The oscilloscope on a synth layer reads the signal at that point, which matches what you hear.
This whole strip is a voice group. Each layer has a base voice group for ordinary steps, and each locked step gets its own (see parameter locks below). On every step the engine rolls probability first, then chokes, then triggers, so notes on the same step never cut each other off.
Working around Tone.js
Tone.js does the hard parts of browser audio well: a sample-accurate transport on the Web Audio clock, and synths, effects and players ready to connect. Most of the technical work in raster was in the places where its defaults assume a simpler instrument than a sequencer that cuts, locks and switches sounds while it plays.
PolySynth.releaseAllOnly releases notes that are still held, so it can’t cut a tail that is already releasing. A kick’s 1.4 s tail kept ringing through a choke.
raster drops PolySynth and runs its own pool of 8 voices per layer, each behind a gain that drops to zero in 3 ms.
choked tail −44 dB → −78 dB
PolySynthCan’t wrap PluckSynth or NoiseSynth, because they aren’t monophonic synths.
The same voice pool plays every engine, so all seven behave the same way.
rampToTone schedules about 0.1 s ahead, and a plain rampTo starts at the end of that window. Effects that were switched off were still sounding when they were removed, and a gain set with rampTo(x, 0) played at full level for that tenth of a second, twice as loud.
FX fades start at Tone.immediate() instead, and the saturator is built at its final gains.
toggle click 0.4 → within 0.014 (steady signal: 0.006)
main-thread schedulerAnything that blocks the main thread stops the music. A window.confirm dialog froze playback mid-bar.
Destructive actions ask for a second click instead, and the app never opens a browser dialog.
ToneAudioBuffer.reverseFlips the audio in place, which would reverse the sample for every layer that shares it.
Reverse and ping-pong play from a separate reversed copy, made once and cached.
GrainPlayerStops grains without a fade, which clicks.
Each granular hit fades out through its own gain.
Tone.DrawA callback queued just before the transport stops can still run afterwards and light the playhead again.
Draw callbacks check that the transport is still running.
modulationEnvelope.decayTone’s default is 0, which a logarithmic knob can’t reach.
That knob starts at 1 ms.
Keeping React out of the audio path
Audio timing is kept apart from React rendering.
- Notes live in a mutable ref, not React state. The scheduler reads them when it triggers.
- Timing runs on the Web Audio clock through Tone.js. The playhead is drawn with
requestAnimationFrame, so a dropped frame never delays a note.
On a throttled CPU the UI still crawled, because every step re-rendered the whole app. I moved the playhead position into a small store that four components read, styled the playhead with a data attribute, and memoised the grid rows.
frame time p50 · 8 layers playing · 6x CPU throttle
from 149 ms. p95 went from 183 ms to 33 ms, including while dragging an FX send.
Parameter locks
Parameter locks come from Elektron machines: any knob can take a different value on a single step. Step 9 might get a darker filter and step 13 a longer release, while every other step uses the layer’s settings.
The simple way to build this is to change the shared synth just before the locked step plays. That breaks tails, because the previous note is still ringing through the same voice and changes with it.
So each locked step gets its own voice group, a copy of the instrument and channel strip that is created the first time the step plays. Playing a note never changes an instrument’s settings, and each tail keeps the settings it started with.
The data stays small. Base values are stored per synth kind, so switching a layer from FM to AM and back restores the FM settings. Locks are stored per step. A value resolves as default, then base, then lock.
Sample chopping
Loading an audio file into a sample layer changes what the rows mean.
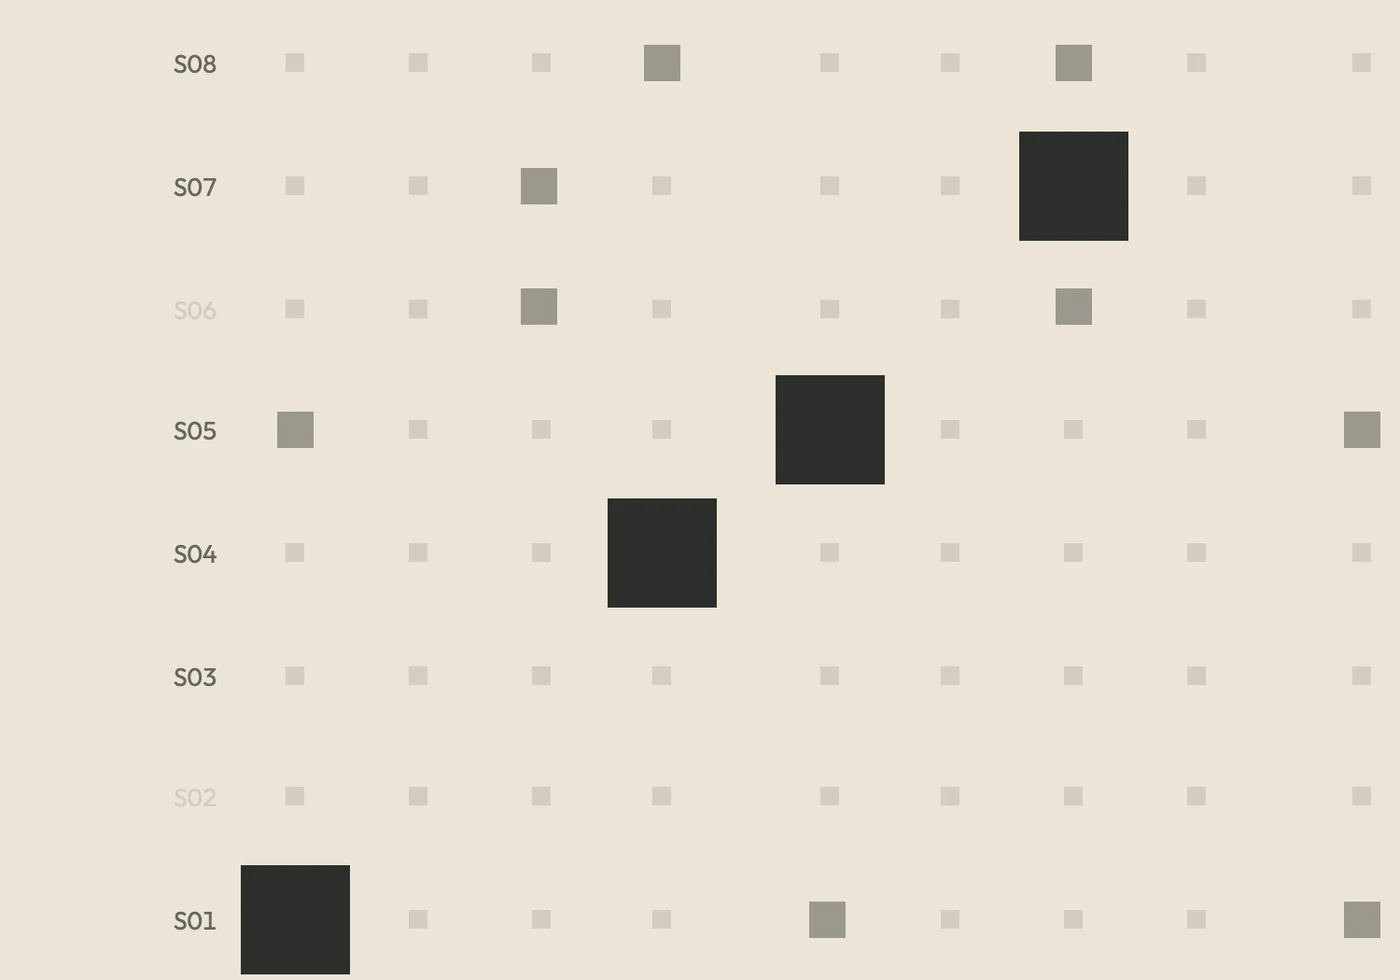
Instead of notes in a scale, each row plays a slice of the file: row 1 plays slice 1, row 2 plays slice 2, up to 16. You program a chopped break by placing notes on the grid.
-
01
Region
Each sample has a region, the part of the file that gets sliced. It has drag handles on the waveform, and the rest of the file is shaded. Slices only fall inside the region, so two layers can use the same recording and chop different bars of it. Moving an edge re-cuts the region right away, with the same slice count and method.
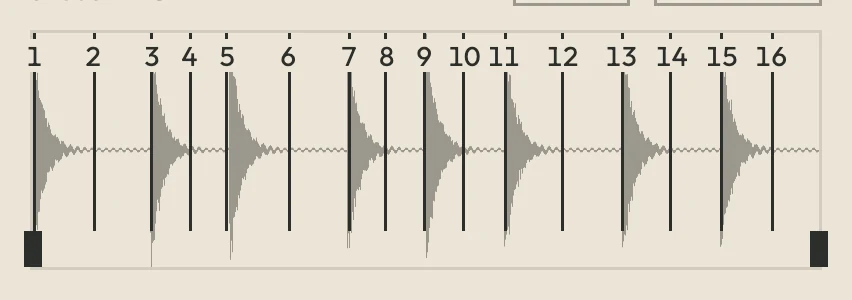
Slice markers on top, region handles at the bottom corners. -
02
Cut
There are three ways to cut:
- Equal slices across the region, for loops that already sit on the grid.
- Transient detection. The region is split into 512-sample frames, and a slice starts where the energy rises sharply. The biggest rises are taken first, at least 50 ms apart, and rises smaller than 2% of the biggest are ignored. Each cut then moves back a few frames to where the rise began, so it lands just before the attack. On a test break all 8 hits were cut between 0 and 11 ms early and none late. If the file has fewer hits than slices, the widest slice is halved until the count is reached.
- By hand: drag a marker or nudge it with the arrow keys. Clicking between two markers plays that slice.
The slice count (1–16) is a setting. Changing it re-cuts the region with the last method used: transient cuts run detection again and equal cuts stay equal. Hand-placed markers fall back to equal slices, since there’s no good way to add or remove markers that someone placed by ear. Rows above the count are dimmed and silent, but their notes stay, so raising the count brings them back.
Equal slices, then transient: the markers jump to the hits. Each slice flashes as it plays. -
03
Play
A slice plays once through to its end, whatever the step length, unless something cuts it off. A sample layer’s mute group is on by default, so each new slice cuts off the one still ringing. With it on, the tail of a slice under the next one measured −57 dB instead of −18 dB. With it off, slices overlap.
Start and length, as percentages of the slice, trim each hit, with 3 ms fades at both ends by default. Slices play forward, reverse or ping-pong. Every one of these settings is an ordinary parameter, so it can be locked per step: one hit reversed, another pitched down an octave. The waveform flashes each slice when it plays, after probability, so you can see which slices fired.
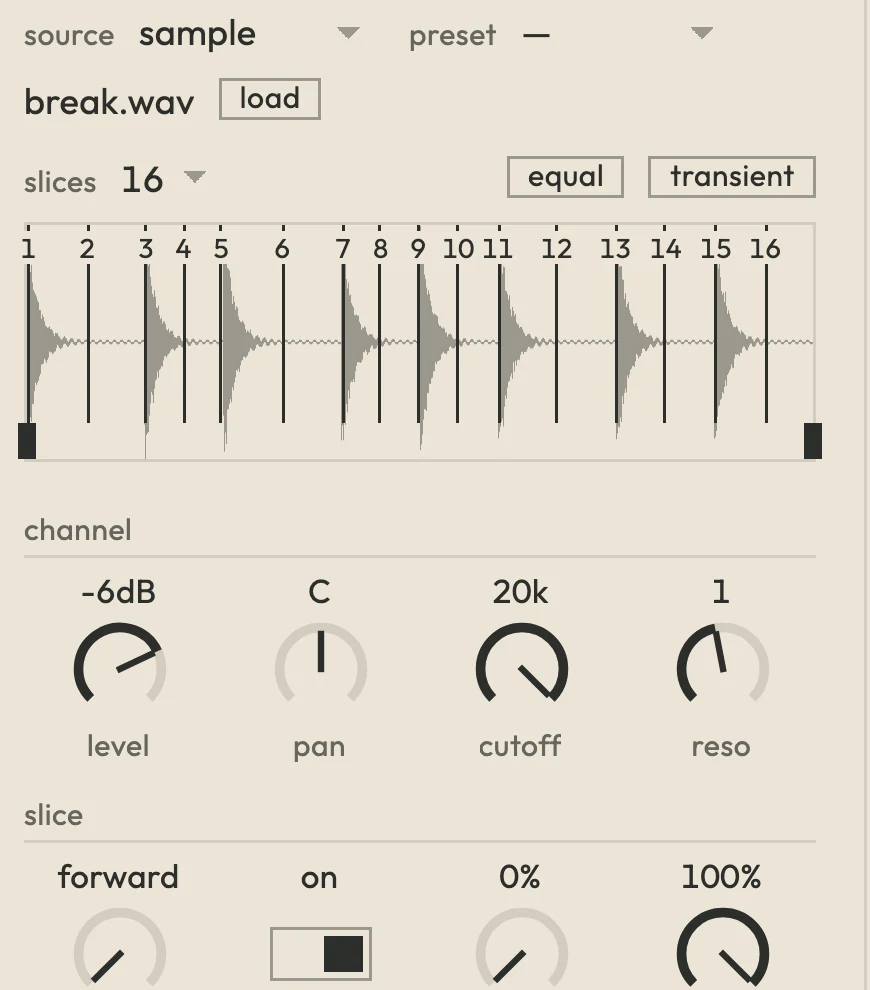
File, slice count and cut method above the waveform, slice settings below. -
04
Stretch
In repitch mode (the default), tune changes speed and pitch together, like a turntable. In granular mode, tune changes only the pitch, and speed (25–400%) changes only the length, with adjustable grain size and overlap.
Fit sets the region to last ¼, ½, 1, 2 or 4 bars at the current tempo. It’s recalculated on every hit, so it follows tempo changes and region edits. In repitch mode it replaces tune. In granular mode it replaces speed and leaves tune to set the pitch. New samples load with fit at 1 bar, so a loop plays in time as soon as it’s loaded.
Detection only measures broadband energy, so it can miss a soft hit under a loud one. Spectral flux would fix that if it becomes a problem. Locking the region or slice count per step, as the Octatrack does, is postponed until it gets its own design.
raster · React, Tone.js, Vite
Leave a Reply